Amazon Elastic Compute Cloud (AWS EC2) is the Amazon Web Service which is used to create and run virtual machines (instances) in the cloud. This step-by-step guide helps administrators to successfully launch a Linux virtual machine on Amazon EC2 for Free of Cost.
By referring previous post, you must have created AWS account for Free.
Step 1: Launch an Amazon AWS EC2 Instance
Click here to open the AWS console home page. Click on EC2 to launch a new instance.

To start using Amazon EC2 you need to launch a virtual server, known as an Amazon EC2 instance.
Click on Launch Instance. Follow the screenshot for next step:
 Step 2: Configure your instance

1. Choose Amazon Machine Image (AMI)
Select any flavor like Ubuntu, Red Hat etc. which you are familiar with. Please note if you are going to create instance for FREE then choose the instance which is free tier eligible.
Here we will choose Red Hat flavor of AMI.

2. Choose Instance Type
Amazon EC2 provides a wide selection of instance types optimized to fit different use cases. Instances have varying combinations of CPU, memory, storage, and networking capacity, and give you the flexibility to choose the appropriate mix of resources for your applications.
Choose any instance type based on your requirement. For learning perspective, here we will choose “t2.micro” which is available for FREE.
Next click on “Configure Instance Details”.
 3. Configure Instance Details
Now configure the instance details, if you are familiar with Networking and Cloud instances else leave it with default settings.
Make sure number of instances is set to 1.

Next click on ‘Add Storage’. Refer the screen shot above for reference.
4. Configure Storage
Here you can choose size of storage for this instance. We are choosing default 10 GB storage.
 Then click on ‘Tag Instance’.
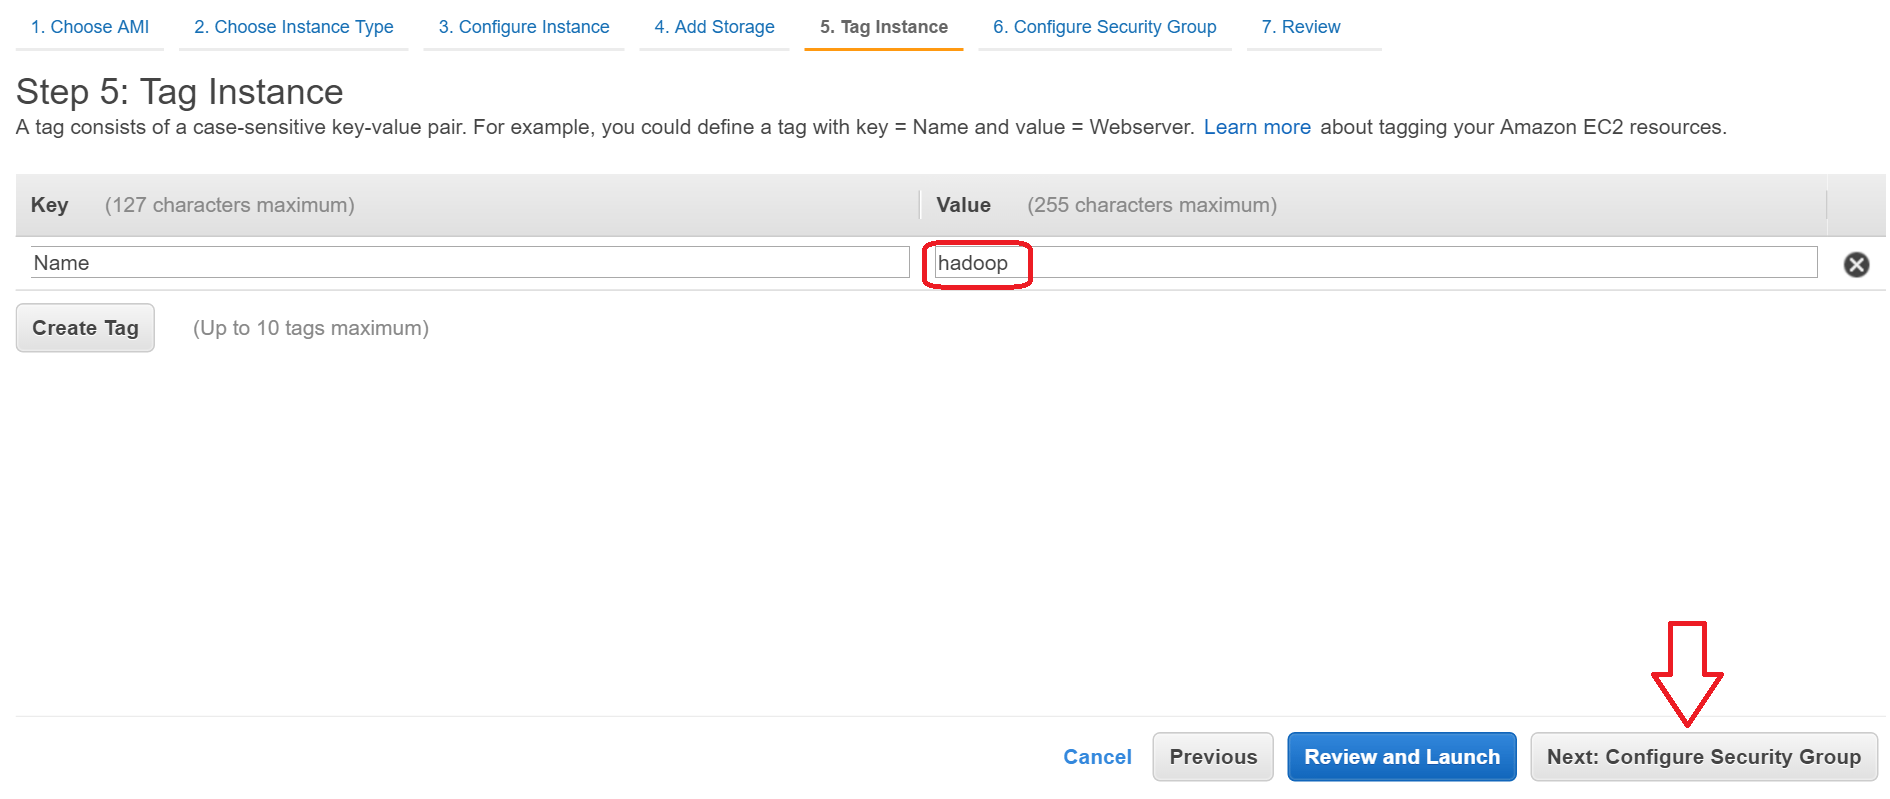
5. Tag the instance
Give a name to this Instance and click Configure security group.
 6. Configure Security
Here you can configure the firewall rules that control the traffic for your instance. Click on Add Rule button for adding new security rule.
Add a rule to access this machine from anywhere as shown in below image-

Now click on “Review and Launch” button.
Then again click on ‘Launch’ to launch this Instance.
7. Generate Authentication Key
You will get a screen to generate authentication key pair.
NOTE: Make sure you have downloaded the private key file (.pem file) else you will not be able to access your instance.

After downloading the private key (.pem file), click on “Launch Instances” button.
8. View Instance Details
After Launching the Instance, you will get message “Your instances are now launching”. Click on “View Instances” button to see the details.

As shown in above image for each instance, you can see complete details like public IP, private IP and name etc.
Here we have not set any elastic IP to this instance, so public IP may change after every reboot.
That’s it!! Now you have launched your EC2 instance for FREE.
Step 3: Access your EC2 Instance from Windows
You need PuTTY to access this Instance through Windows.
PuTTY does not support AWS private key format (.pem) generated by Amazon EC2. PuTTY only reads .ppk file format for authentication so first you need to convert private key file from .pem into .ppk format.
For this first download PuTTY Key Generator (puttygen.exe) from here.
After downloading the PuTTYGen, open this tool.

Click on “Load” button. It will open file browser, now select file type as “All Files” and then you will have to attach your EC2 key pair file (.pem file).

Click on “Save private key” button and save ppk file on your system.

You can now connect to your EC2 instance using PuTTY’s SSH client.
Open PuTTY Terminal
Enter public IP address of your instance.
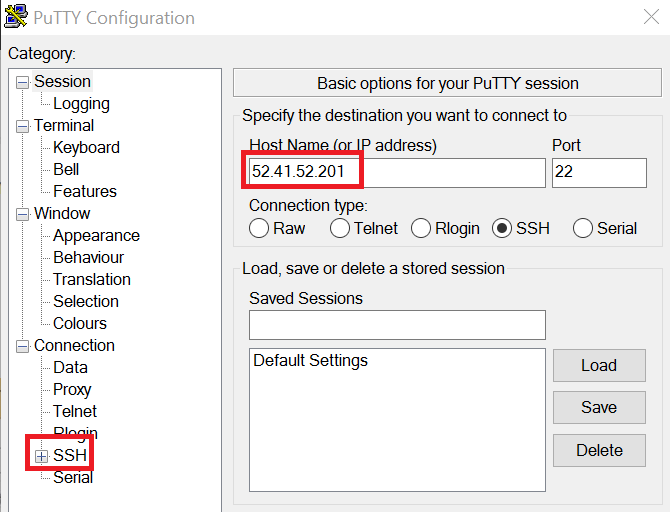
In left panel of PuTTY, expand “SSH” under Connection and then select “Auth”. Now follow below steps:
- Click Browse
- Locate your PuTTY private key (.ppk)
- Click open

When it will prompt for login name, type ec2-user and press enter.

Now you have successfully login into your instance.
Step 4: Stop your instance after use to Avoid unexpected charges
As described earlier, in free tier account, you can run EC2 instances for 750 hours per month for FREE. So if have created only one instance then that instance can be run for an entire year without paying any cost. As free tier account is valid for 12 months and in a month single instance can run maximum 24*30=720 hours so that means you can run single Linux instance for an entire year for FREE. 🙂
In case you have created multiple EC2 instances, then you might get charged if you don’t stop the instances.
To stop an EC2 instance, select that instance and click on Actions -> Instance State -> Stop. Refer below image for details:-

After stopping the instance, similarly you can start it based on your needs.
Related Posts: